Get it All
Together

One of the most important concepts in the world of WordPress web development is that of the parent/child relationship between themes. The parent/child relationship is a scenario in which a “parent” theme represents the final source of all code: if you cannot find a given file in a theme declared a “child” of one parent, then you should be able to find that file in the parent. The purpose of this relationship is to allow the child theme to extend and enhance the parent theme as suits a given website’s needs, while still maintaining the base level functionality of the parent theme. This failover system further augments WordPress’s excellent Template Hierarchy structure, guaranteeing a suitable template layout file for any request.

When properly understood and executed, this parent/child relationship allows developers to build complex parent themes from which all manner of new websites can be built in the child theme. Doing so is a sure-fire way to maximize the learning curve of your software: new techniques and interfaces can become available to the next project, instead of stuck in a single-site solution.

In my case, my parent theme is really just a toolbox of functionality and layout helpers with almost no usable layout of it’s own: it provides the toolbox and a few baseline layouts like a generic archive and single-post page. All the implementation of that toolbox happens in the child theme. I have even augmented the parent/child relationship a bit by providing failover support for JavaScript files and non-layout files in my theme.

That said, I’m always looking for better ways to make use of this relationship. So I was pretty excited when I found out that Advanced Custom Fields comes with the option to save it’s field declarations as local JSON files. I’d previously been doing all the work of creating Custom Post Types – and their backend interfaces – more or less by hand. But having worked with ACF for a bit, I realized it was a more efficient means of adding meta fields by miles.

Now it seemed, I’d found a way to statically create the fields I needed for my base CPTs and have them extend and be extended by a child theme. Perfect!

Not So Perfect, Yet.

Now, I’m pretty particular about my directory structure for my plugins. I like things organized more like the PSR2 standard prefers and fortunately, the WordPress-Core standard also recommends something similar. With that in mind, ACF’s default location for local JSON does not suit me. I’d rather not have an /acf-json directory in the root of my theme. Instead, I’d prefer to have my ACF-specific JSON files live somewhere in the /Library/ directory of my theme.

But there is a solution for this! Advanced Custom Fields provides filter hooks in that part of the code that saves and retrieves JSON, as they explain in the documentation for local JSON. Those hooks are ‘acf/settings/save_json’ and ‘acf/settings/load_json’. So my first attempt to move the JSON to my desired destination looked like this:

The persistent problem I ran into with this setup was that ACF seemed always to be confused as to which directory it should be saving and recalling from. If you read through that code, it at least attempts to establish the same parent/child relationship as WordPress uses for standard template files. New changes to Custom Fields should always be stored in the current (most often, the child) theme directory. When pulling JSON to populate fields, a child theme’s /Library/Acf-Json folder should be used first, followed by the parent theme.

But in practice, after successfully changing a field name in a child theme, the Custom Fields admin pages would show the correct new name and the Write Post screen would display the old name. Those fields did not present the option to “synchronize” themselves, so there seemed to be no real fix. This was all discussed with the forum help at ACF here.

After a bit of digging and considering and reading the actual ACF files in question (/advanced-custom-fields/includes/wpml.php, if you’re interested), I decided that rather than simply add my own code to the acf/settings/save_json hook, I would remove the default function completely. By doing this and using array_push to be sure I was saving the directories in the correct order, I was able to achieve the the correct functionality. So I commit this blog post for the benefit of those who find themselves similarly challenged by this super-helpful but perhaps less than well-documented feature of Advanced Custom Fields:

As much as I love WordPress, I am continually frustrated with the pace at which forms get created. That’s because, while WordPress seems to have thought of everything else, the most basic part of creating interactive websites seems to have been ignored: the forms.

Yes. There are front end form builders like Ninja Forms. But while they all work well within their own context, much of the customization of the forms either requires additional, paid-for plugins or simply isn’t possible due to constraints of the plugins themselves. Besides which: I’m not often building front-end forms, but rather forms to add metadata to posts or set configuration variables for the site.

What I have wanted and needed was something like CakePHP’s FormHelper: an interface that simplifies the process of outputting HTML5-valid forms and inputs. Something that allows me to specify the settings for an input, and puts the aggravating process of laying out the form in it’s own hands. And so I created EasyInputs: A Forms generator for WordPress.

The plugin is still in early stages of development. But so far, I’ve been able to clean up and cut down on code for one of my other projects significantly. And besides speed and accuracy, there are a couple of key advantages to building forms in this way. For a start, if you’re trying to keep your WP code as close as possible to PSR2 standards, adding values to an array is a lot more convenient than sprintf’ing the long HTML code associated with forms. Secondly, the code output from my plugin is significantly clearer than a rat’s nest of escaped and unescaped HTML code.

WP-Scholar’s Person CPT with escaped HTML:

WP-Scholar’s Person CPT with EasyInputs:

This is just a relatively basic example. The plan is to support every HTML-valid input including <datalist>, <keygen> and <output>. Right now, these new elements are missing. I’ll be updating that shortly (perhaps before you even read this!), along with some basic HTML security: every EasyInputs text input will include the maxlength attribute.

I know that the WordPress devs are working on some sort of fields API. But as I’ve observed it, the development process still banks too heavily on bringing those fields into the WP regime, which may satisfy the needs of the WordPress team, seems too rigidly focused. Developers don’t need a complete solution for every little thing, they need simple tools that do simple things well. That’s the aim of this development project.

Please have a look at the latest stable tag and tell me what you think!

I’m not a fan of unstyled content. I don’t think many developers are. Worse, while I like to reuse my dialog divs, I don’t want the old content confusing users when the dialog first opens. And of course, users often rush to try to use dialogs as soon as they open, so we need to give the dialog a chance to load it’s content before that. So I needed to create a generic function for opening a jQuery dialog box, putting a “spinner” in the box until the proper content loads. Here is my solution:

https://gist.github.com/holisticnetworking/2a9652eb9cc161a5254177893e81f2d9

The function presumes you will be loading content from an AJAX call and provides a couple of very handy parameters. First, you can pass the complete option object for the jQuery Dialog API into your function call, making the dialog itself completely customizable. Second, it provides a callback function parameter, which will be run after the content is loaded into the content area of the dialog.

To use this function, simply include the following HTML into your page, somewhere near the footer (I use CakePHP, but you can just use a regular image call to get the spinner:

https://gist.github.com/holisticnetworking/65740348887ebe435e73d716005fb945

Use your CSS to hide the #popup div and you’re ready to start implementing dialog boxes the smart way!

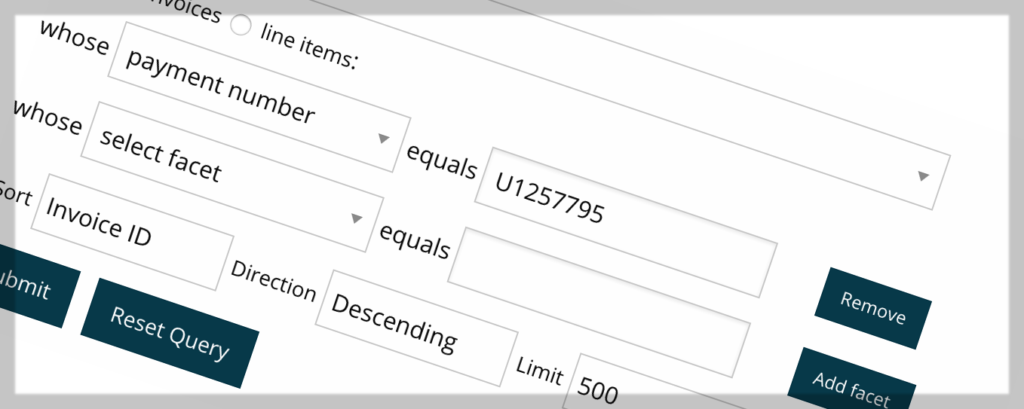
So the issue is this: I’m creating a faceted search interface for a client’s application. Rather than clutter a window with textbox after textbox, select after select, most of which they don’t use on a regular basis, my solution is to create dynamic form fields based on the user’s requests. Need to search a SKU? No problem! Need to select from a list of clients? Gotcha covered.

All of this has worked out quite swimmingly overall, but a bug was brought to my attention today that I had to share with the rest of the Internet. Specifically: users were typing their responses into a jQuery Autocomplete field and then clicking “Submit,” only to find that their response was not recorded and not passed on in the query. Annoying!!

With a bit of digging, I discovered the problem. The jQuery autocomplete UI does not allow the value of the field to be updated until one of two events is fired: “change” and “select.” Trouble is: if you go directly from typing a value into the autocomplete field, directly to the submit button, the “change” event does not have time to fire.

The solution to the problem, which I discovered on the always-helpful StackOverflow website, follows below. The gist of it is that you need to first prevent the form from submitting, double-check that autocomplete fields have been properly “change”-d and then submit the form:

https://gist.github.com/holisticnetworking/6d63c1bcd9aeecb4604ca76392406e49

I’m sure I’m not alone among developers who are continually frustrated by the lack of imagination shown for implementing the Customizer in WordPress. Sure, I have praised its existence and support its use to replace the labyrinthine system of developer-created admin pages. But then once I got into serious development work, I quickly found that having all the HTML controls handed to you means having the ability to decide how they get rendered taken away from you.

For example, I’d like to give users of my core theme the option to define the number and content of columns on their site. Doing so obviously means creating repeating fields: first, you define the user-specified number of columns, then you produce enough identical fields as necessary to define each column. In my case, that meant providing an ID, column width at various responsive sizes and of course, the content of the column.

Yes. I could certainly decide that no one needs more than four columns and just assign each column it’s own static block of controls. If there’s no Column 4, then those settings are just ignored. But this is a sloppy way to build a UI that is going to naturally lead to some confusion when changing settings never seem to have any effect. Better, then to just have dynamically created settings blocks. One drawback: the Customizer API has no repeating fields and doesn’t even include a vehicle for a button that doesn’t submit, leaving you without the option to create a JS-driven solution.

After months of frustration, I eventually found Kirki. Now, we are talking! I currently include Kirki as a Composer package into the core of my base theme, but it’s also available as a plugin for those who would be more comfortable with that solution. From the Kirki homepage:

Kirki is a Toolkit allowing WordPress developers to use the Customizer and take advantage of its advanced features and flexibility by abstracting the code and making it easier for everyone to create beautiful and meaningful user experiences.

So, it’s not an entirely new API or a replacement. It simply harnesses the power already manifest in the Customizer, but gives it a few gooses that make it a whole heck of a lot easier and more flexible to use.

Using Kirki

Kirki frees you to create forms that properly express what your theme does, rather than having to build all that functionality into your theme or worse than this, simply allow your theme to be driven by the limitations of the current Customizer UI. A full spectrum of HTML5 form elements is introduced, along with a plethora of more exotic controls. Especially useful for me – beside the repeater control – were the multicheck and radio-image controls. But there’s so many more that I’d like to play around with! Maybe for some custom implementations, I suppose.

Replacing the existing Customizer API calls with the Kirki API calls was a snap in fact, about the only confusion was that there was so much less code than before, I had to keep checking that I’d actually gotten all the controls passed over:

[php] // Icon Fonts:
Kirki::add_field( ‘hn_reactive’, array(
‘type’ => ‘multicheck’,
‘settings’ => ‘icon_fonts’,
‘label’ => esc_attr__( ‘WeLoveIconFonts’, ‘hn_reactive’ ),
‘section’ => ‘icon_fonts’,
‘priority’ => 10,
‘choices’ => ReactiveCustomizer::$icon_fonts,
) );[/php]

I use nine fonts from WeLoveIconFonts.com, so as you might imagine, a huge selection of code simply disappeared when this Kirki version replaced it. Who doesn’t love that??

As for building repeatable blocks of controls, this too is a simple matter:

[php]/*
// Columns:
*/
Kirki::add_field( ‘hn_reactive’, array(
‘type’ => ‘repeater’,
‘label’ => esc_attr__( ‘Column Definitions’, ‘hn_reactive’ ),
‘section’ => ‘hn_layout_defaults’,
‘priority’ => 9,
‘settings’ => ‘column_contents’,
‘default’ => array(
array(
‘content’ => ‘post_data’,
‘small’ => ‘9’
),
array(
‘content’ => ‘default’,
‘small’ => ‘3’
),
),
‘row_label’ => array(
‘type’ => ‘text’,
‘value’ => ‘Column’
),
‘fields’ => array(
‘col_id’ => array(
‘type’ => ‘text’,
‘label’ => esc_attr__( ‘CSS Column ID’, ‘my_textdomain’ ),
‘description’ => esc_attr__( ‘Any XHTML-compatible ID you like’, ‘my_textdomain’ )
),
‘content’ => array(
‘type’ => ‘select’,
‘label’ => esc_attr__( ‘Content’, ‘my_textdomain’ ),
‘description’ => esc_attr__( ‘Specify what kind of content will go in this column’, ‘my_textdomain’ ),
‘choices’ => $this->content_choices(),
),
‘small’ => array(
‘type’ => ‘text’,
‘label’ => esc_attr__( ‘Cols at small’, ‘my_textdomain’ ),
‘description’ => esc_attr__( ‘How many grid columns this column takes up at small and up sizes.’, ‘my_textdomain’ ),
),
‘medium’ => array(
‘type’ => ‘text’,
‘label’ => esc_attr__( ‘Cols at medium’, ‘my_textdomain’ ),
‘description’ => esc_attr__( ‘How many grid columns this column takes up at medium and up sizes.’, ‘my_textdomain’ ),
),
‘large’ => array(
‘type’ => ‘text’,
‘label’ => esc_attr__( ‘Cols at large’, ‘my_textdomain’ ),
‘description’ => esc_attr__( ‘How many grid columns this column takes up at large and up sizes.’, ‘my_textdomain’ ),
)
)
) );[/php]

I have so far found Kirki to be exactly the tool that I need, until of course WordPress comes up with their own solution.. and who knows when that will be?

For years, front-end layout developers have struggled with how best to manage Cascading Style Sheets in a way that is organized. In particular, I have always found maintaining a color scheme of a few basic colors a pain with conventional CSS. That’s because we so often refer to one color across multiple style declarations. Dozens, really, and if you want to make an adjustment to your color scheme, that requires tedious search and replace that invariably ends up confusing you.

Cascading Style Sheets cascade, but they’re static.

My solution has been in the past to create separate stylesheets focused on color – and along with that, another for typesets. This helped keep my color declarations centrally located, but added the complexity of having to declare a given class or ID’s style multiple times: once for my main structural CSS and again for my color CSS. Better, but not great. And adding stylesheets is going the wrong direction in terms of efficient load times.

With SASS, my first blast of enthusiasm was for variables. Now instead of having to maintain a separate color stylesheet, I could simply declare colors as variables and then use them where necessary. Instead of search and replace, minor color edits could happen by redefining a single variable. Sweet!

[css]// Category Styles:
$blue : rgba(77, 68, 102, 1);
$red : rgba(153, 15, 38, 1);
$grey : rgba(115, 153, 145, 1);
$white : rgba(255, 255, 255, 1);[/css]

This is great! But I ran into a situation with styles that left me wanting more.

Because I like to give my audience visual queues that reinforce my category-based blog sections, I want to be able to associate those top-level categories with specific colors. Then I’d like to be able to color either the text, background or border of a given element with a complimentary color.

Now, I could type all those styles out. But this is SASS: the dynamic CSS generator. Surely, there must be some easier way?

Yes, there is. Seeking out a solution for my newest bout of inspirational laziness (pronounced “programming”), I sought out the help of folks at Stack Exchange. And that way is to use a mixin and what in PHP would be called a “multi-dimensional array.” Observe:

[css]$categories:
technology rgba(20, 78, 102, 1),
science rgba(153, 15, 38, 1),
rochester rgba(166, 159, 33, 1),
politics rgba(10, 82, 60, 1),
journalism rgba(224, 176, 11, 1);
@mixin category-backgrounds() {
@each $category in $categories {
.bg-#{nth($category, 1)} {
background-color: nth($category, 2);
}
.fg-#{nth($category, 1)} {
color: nth($category, 2);
}

.bd-#{nth($category, 1)} {
border-color: nth($category, 2);
}
}
}[/css]

The result is a list of CSS elements like so:
[css]/* line 108, ../scss/app.scss */
.bg-politics {
background-color: #0a523c;
}

/* line 111, ../scss/app.scss */
.fg-politics {
color: #0a523c;
}

/* line 115, ../scss/app.scss */
.bd-politics {
border-color: #0a523c;
}

/* line 108, ../scss/app.scss */
.bg-journalism {
background-color: #e0b00b;
}

/* line 111, ../scss/app.scss */
.fg-journalism {
color: #e0b00b;
}

/* line 115, ../scss/app.scss */
.bd-journalism {
border-color: #e0b00b;
}[/css]

And so on. Easy, convenient color management for CSS! Oh, I think SASS and I are going to get along just fine, thank you.

For nearly as long as there has been a WordPress, themes have included a functions.php file. This file provides a lot of extra, for lack of a better word, “functionality” to your WordPress blog. And while so much else about WordPress has changed over the years, it is quite remarkable how little about the functions.php file has evolved.

This is particularly true in light of WordPress’ ability to create child themes. Child themes are separate themes which extend the functionality of their “parent” themes by overriding key theme files. A child theme may only have a style.css file, to refer back to the parent. Or it might include a single.php file, because in the case of this one theme, you want all the functionality of the parent, but you’d like single posts and pages handled differently.

The trouble is: while a template file can override it’s parent, the WP functions.php file just basically loads the namespace with a bunch of free-floating functions, usually prepended with the name of the theme. There isn’t any “overriding” a function in PHP; the only thing you can do is write another function with still another name or prefix. That’s not very efficient use of the namespace and a recipe for confusion.

Instead, what I decided to try was putting my entire list of functions inside a class. Call it ParentFunctions. Inside this class, I also included a self-named initialization function that would do the adding of filters and actions as necessary. Then, all I need to do is instatiate my object – and be sure to call the “global” in each file where its necessary – and I’ve got an extensible model from which to create child themes.

Let’s look at ParentFunctions:

Among the advantages, here, is that our namespace is much cleaner. So is our code: instead of having to trawl through a couple dozen prefix_function_name entries, I can get straight to function_name. But better still, if I want to modify how a function works in a child theme, that’s even easier:

Using classes in your WP functions.php file provides a cleaner, easier interface for extending your themes for whatever you need.

Small reference to one of my favourite authors, Tad Williams, in the title of this post. But the quote, taken from the Memory, Sorrow and Thorn series, really paints the picture I wanted for this post in terms of the lesson I found myself suddenly learning yesterday. I don’t know how useful an article this will be, but I guess I just wanted to write out my thoughts because they seem important to me. Guess that’s why they call it blogging, huh?

The system I’m building is a kind of a specialized content management system for my company’s website. As such, each “page” can define its own “template,” or layout system that defines the specific view. My boss was very impressed by this system, which is good, but later he called me with another idea: why not create two folders for templates, one for templates that are reusable, and one for templates that pretty much only get used for a specific page and never again.

On the surface, this seems to make some sense: we do have one-off pages that would require a template that never gets used again. But for reasons I couldn’t quite articulate at the time, I thought it was a terrible idea and still do. After a night to think it over, I realized that the challenge in programming is always the edge case and that the goal is to eliminate them, not create them. Here’s what I mean:

Lets say for example that we want to create two “buckets” of information, Category A and Category B. A specific set of conditions defines what qualifies for each bucket. We setup logic to compare a data set against this set of conditions and place it in the right bucket. Immediately, we have created a decision point. If the decision is simple and mathematical – size of a file, lets say – there are no edge cases. But if the decision is more complex or based on human decision making, there may be thousands of specific data sets that either fit into both or neither bucket. Then what?

Well, then we have to define a more stringent set of rules, don’t we? Or else more rules. Herein lies the problem, because you can drive yourself nuts trying to come up with a solution for every case. Worse than that, you can riddle your code with flaws and – as the title of this post suggests – create a set of rules so stringent that entirely separate parts of your code are immobilized for fear of violating those rules.

Such is the case with the current website, frankly. Its very well programmed, but unfortunately, so many rules and so many eventualities have been programmed for that its almost as if they’ve painted themselves into a corner. What was built to be flexible is now anything but.

Object Oriented Programming will not help this kind of thing. If the rules of one portion of the program obligate another part of the program overmuch, even cloud-based, OOP web services would grind to a halt.

So, what I’m getting at here is that any new decision point needs to be carefully considered in context. Does the decision represent a really necessary component of the system? Forget the perceived benefits of that decision point, what are the flaws or disadvantages that this decision point would eliminate? If there aren’t any, are the benefits really that valuable? Finally – and perhaps most critically – how many edge cases can you think of and is it really worth the brain power to figure out solutions for each one?

I think another bad habit of us programmers is that we are so enamored of our ability to solve problems programmatically that we feel the need to do so at every step. Here again is an opportunity to introduce new and mind-numbingly confusing edge cases where they’re not needed. Every web page does not need to be assembled by a foreach() loop, if/then decisions and switches: sometimes, plain old HTML with a few choice includes will do just fine.

Its an irony that, after really nearly thirty years of off-and-on programming in everything from BASIC2.0 to CakePHP, I’m only just now appreciating in definable terms: the logical conditions that make programming possible and programs flexible can also be over used to the point of farce.

It happens from time to time that we need to associate Models which do not share a common key. An example of this is when I needed to associate pages with templates in a complex join where the PageSettings Model has a primary key of pageid and the PageTemplate Model has a primary key of template_id. We cannot use the primaryKey index of the association array to indicate the relationship, so we need to bypass that index altogether and instead use ‘conditions’ to specify the relationship as follows:
[php]
var $hasOne = array(‘PageTemplate’ => array(‘foreignKey’ => false,
‘conditions’ => array(‘PageSettings.page_template = PageTemplate.template_id’)));
[/php]
Note also that the ‘conditions’ clause is set using explicit conditions, inasmuch as we are stating that the PageSettings.page_template in the current query should be the same as the PageTemplate.template_id value. I’ve personally been confused in the past, thinking that the ‘PageSettings.page_template’ => ‘PageTemplate.template_id’ formula would naturally be the preferred way of forming the condition in CakePHP. Certainly, that would make sense based on convention, but for reasons I’m not familiar with, this is not how they do it.

Another post in my Development Walk-Through Series, following me through the development of my own application to share my thoughts and observations. Please consider subscribing to my feed if you find this information helpful.

Now that you’re working on your Models in Phase Two of your development process, you have a second opportunity to trim up your database. Once you start putting together CakePHP queries, it quickly becomes obvious that CakePHP will arrange your queries according to it’s own sense of MySQL rather than what you might have originally thought. This means that the database development you did in Phase One will have to be altered a bit.

But the way you put together queries is also important. For example, when assembling the [‘conditions’] array within your query, the order in which you specify the conditions is directly reflected in the way the conditions are built into the query.

Why is this important? Well for a start, because if you’re using any multi-column indexes, those indexes rely on the order of columns in the query being in the same order as they appear in the index. Without the correct order, they simply cannot be used. I don’t have any proof to back this up, but it stands to reason that this fact may point the way to another tweaking possibility: that the order of columns probably matters regardless of whether or not you use multi-column indexes.

The take away from this is that when you create queries in the CakePHP manner, it’s important to look at the resultant query and make sure it’s behaving the way you expected it to. If you can tweak the query, do it. If you cannot, it’s probably time to rethink some of your optimization strategy to better reflect the reality of the system in which you are working.